How To Upload JSON Files to IPFS using IPFS Desktop App


When creating decentralized applications, many turn to blockchain platforms like Ethereum for their ability to manage state, automate processes through smart contracts, and facilitate value exchange.
However, storing application content such as images, videos, or front-end files on the blockchain can be costly and inefficient. Instead, decentralized storage solutions are necessary.
This tutorial presents the InterPlanetary File System (IPFS) as a decentralized storage option. It covers how to upload a JSON file to IPFS, install and set up the IPFS desktop app, configure metadata attributes, and make JSON data available on the IPFS server.
Table of Contents
What is an IPFS?
Why do we need IPFS in blockchain
How to download and set up an IPFS Desktop Application
What is metadata
How to upload a file to IPFS
How to generate the URI for the metadata
How to setup metadata attributes using JSON editor
How to upload JSON file to IPFS Desktop Application
What is the IPFS?
The InterPlanetary File System (IPFS) is a protocol and peer-to-peer network that provides decentralized storage and sharing of files. Although IPFS is not a part of blockchain technology, it can be used together with blockchain to overcome the challenge of storing large files on the blockchain, which can be expensive and inefficient.
Why do we need IPFS in blockchain
One of the advantages of IPFS is that it uses content-addressed storage, which identifies files by their content rather than their location. This makes it difficult for anyone to tamper with the content of a file without changing its address.
In summary, IPFS is a useful tool for blockchain developers as it enables them to store and access data in a decentralized and efficient way.
How to download and set up an IPFS Desktop Application
Install the IPFS Desktop Application
Access the IPFS official documentation installation webpage and adhere to the guidelines relevant to your operating system (such as Windows, macOS, or Linux). The MacOS installation procedure will be recorded by me.
Set up your IPFS Desktop Application
Once you have finished the installation process, launch your IPFS Desktop Application. At startup, the IPFS Desktop Application should appear like this.
What is metadata
You can head up to opensea metadata standards. Data that identifies other data is known as metadata. metadata also includes a reference to the identifiable digital asset, such as a picture, video, or audio file.
Since it is impractical to host a visual or audio asset directly on the blockchain, these assets depend on metadata.
In general, metadata and NFTs are separate entities and not merged. Instead, the digital object within the NFT contains a hyperlink that guides users to the metadata, which is stored online in a specific location.
By supplying asset metadata, your decentralized applications can retrieve detailed information for digital assets and conveniently exhibit them within the application. Usually, digital assets on a particular smart contract are only identified by a distinctive identifier, such as token_id in ERC721. Therefore, metadata enables these assets to possess supplementary attributes such as a name, description, and image.
How to upload a file to IPFS Desktop Application
For this guide, I will be uploading three images to the IPFS desktop application.
To upload a file to the IPFS desktop app, follow these steps:
Open the IPFS desktop app and make sure it's running
Navigate to the status screen by clicking on the Status tab on the left side of the app. At the top of the status screen, you will see that it says Connected to IPFS:

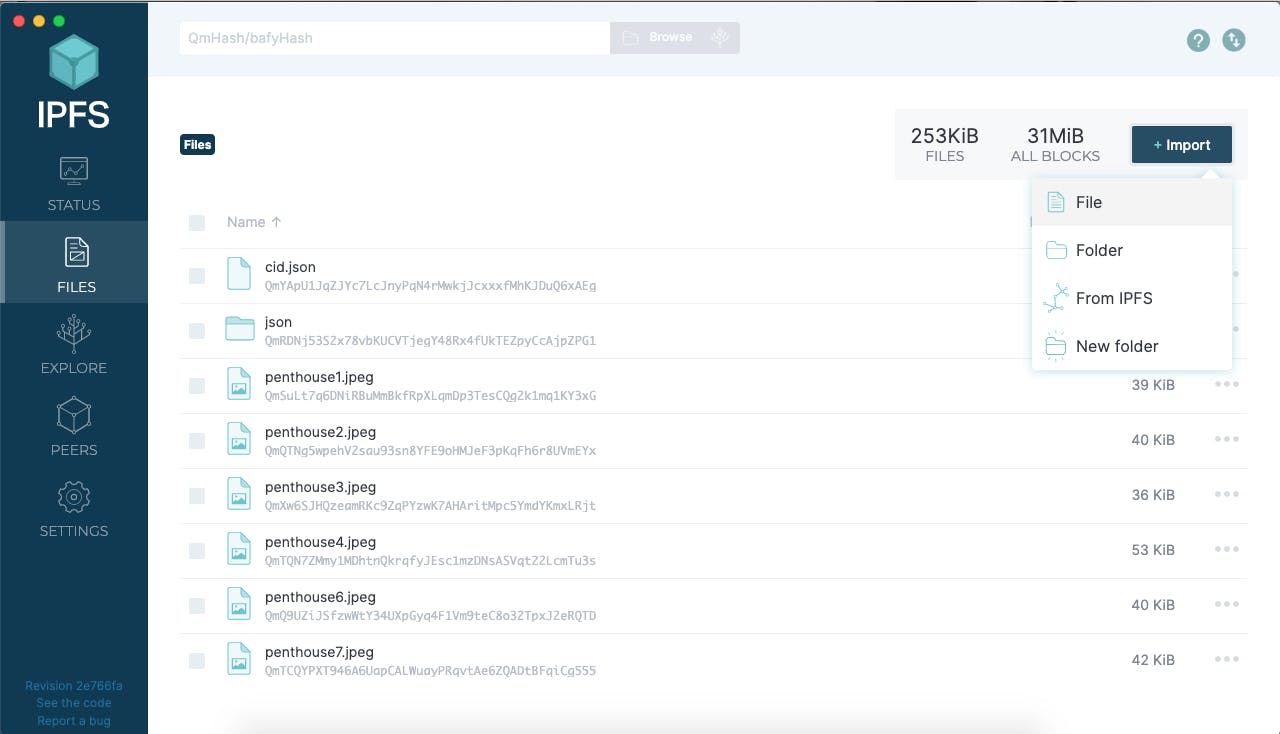
Now that you know you are connected to IPFS, navigate to the files screen by clicking the Files tab.

Click on the "Import" button in the top right corner of the app and select either File or Folder.
I am going to upload three high-end pictures that I obtained from pexels.com onto the ipfs desktop application.
Select the file that you want to upload from your computer.
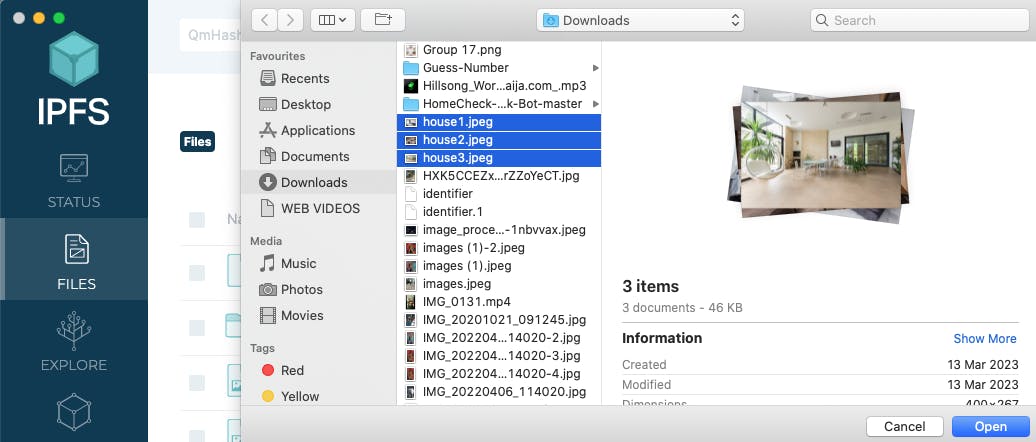
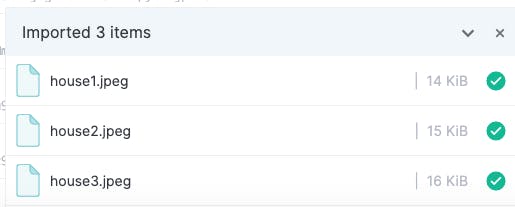
Once the file is selected, click on the "Upload" button in the app.
The app will start uploading the file to the IPFS network and will provide you with a unique IPFS hash for the file once the upload is complete.
you should see the three files imported into your ipfs desktop app
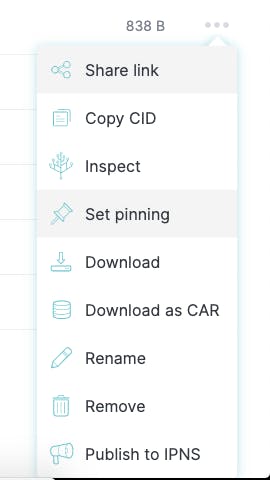
To access the options for one of the uploaded files, select the three dots located in front of it as shown below.
As described in IPFS and the problems it solves, IPFS uses Content Identifiers (CIDs) to handle content-addressed data.
A content identifier, or CID, is a label used to point to material in IPFS. It doesn't indicate where the content is stored, but it forms a kind of address based on the content itself. CIDs are short, regardless of the size of their underlying content.
CIDs are based on the content’s cryptographic hash. refer to this documentation about ipfs cid.
How to access the Content Identifiers (CIDs)
To access a file on IPFS, you need its Content Identifier (CID), which is a unique identifier that represents the file's content. The CID is usually a long string of characters, like the one you provided in the example.
To access the file associated with a CID, you can use a gateway like the one you provided, which will retrieve the file from the IPFS network and serve it to your browser.
So, if you have a CID, you can paste it at the end of the URL in the format ipfs.io/ipfs<CID> to access the file associated with it.

It is clear that we can retrieve the downloaded image using the CID, and it can be accessed in our application in the form it was represented.
We were able to obtain the image as displayed by pasting the URL into our browser.

How to setup metadata attributes using JSON editor
Copy the code given and navigate to the JSON editor online.
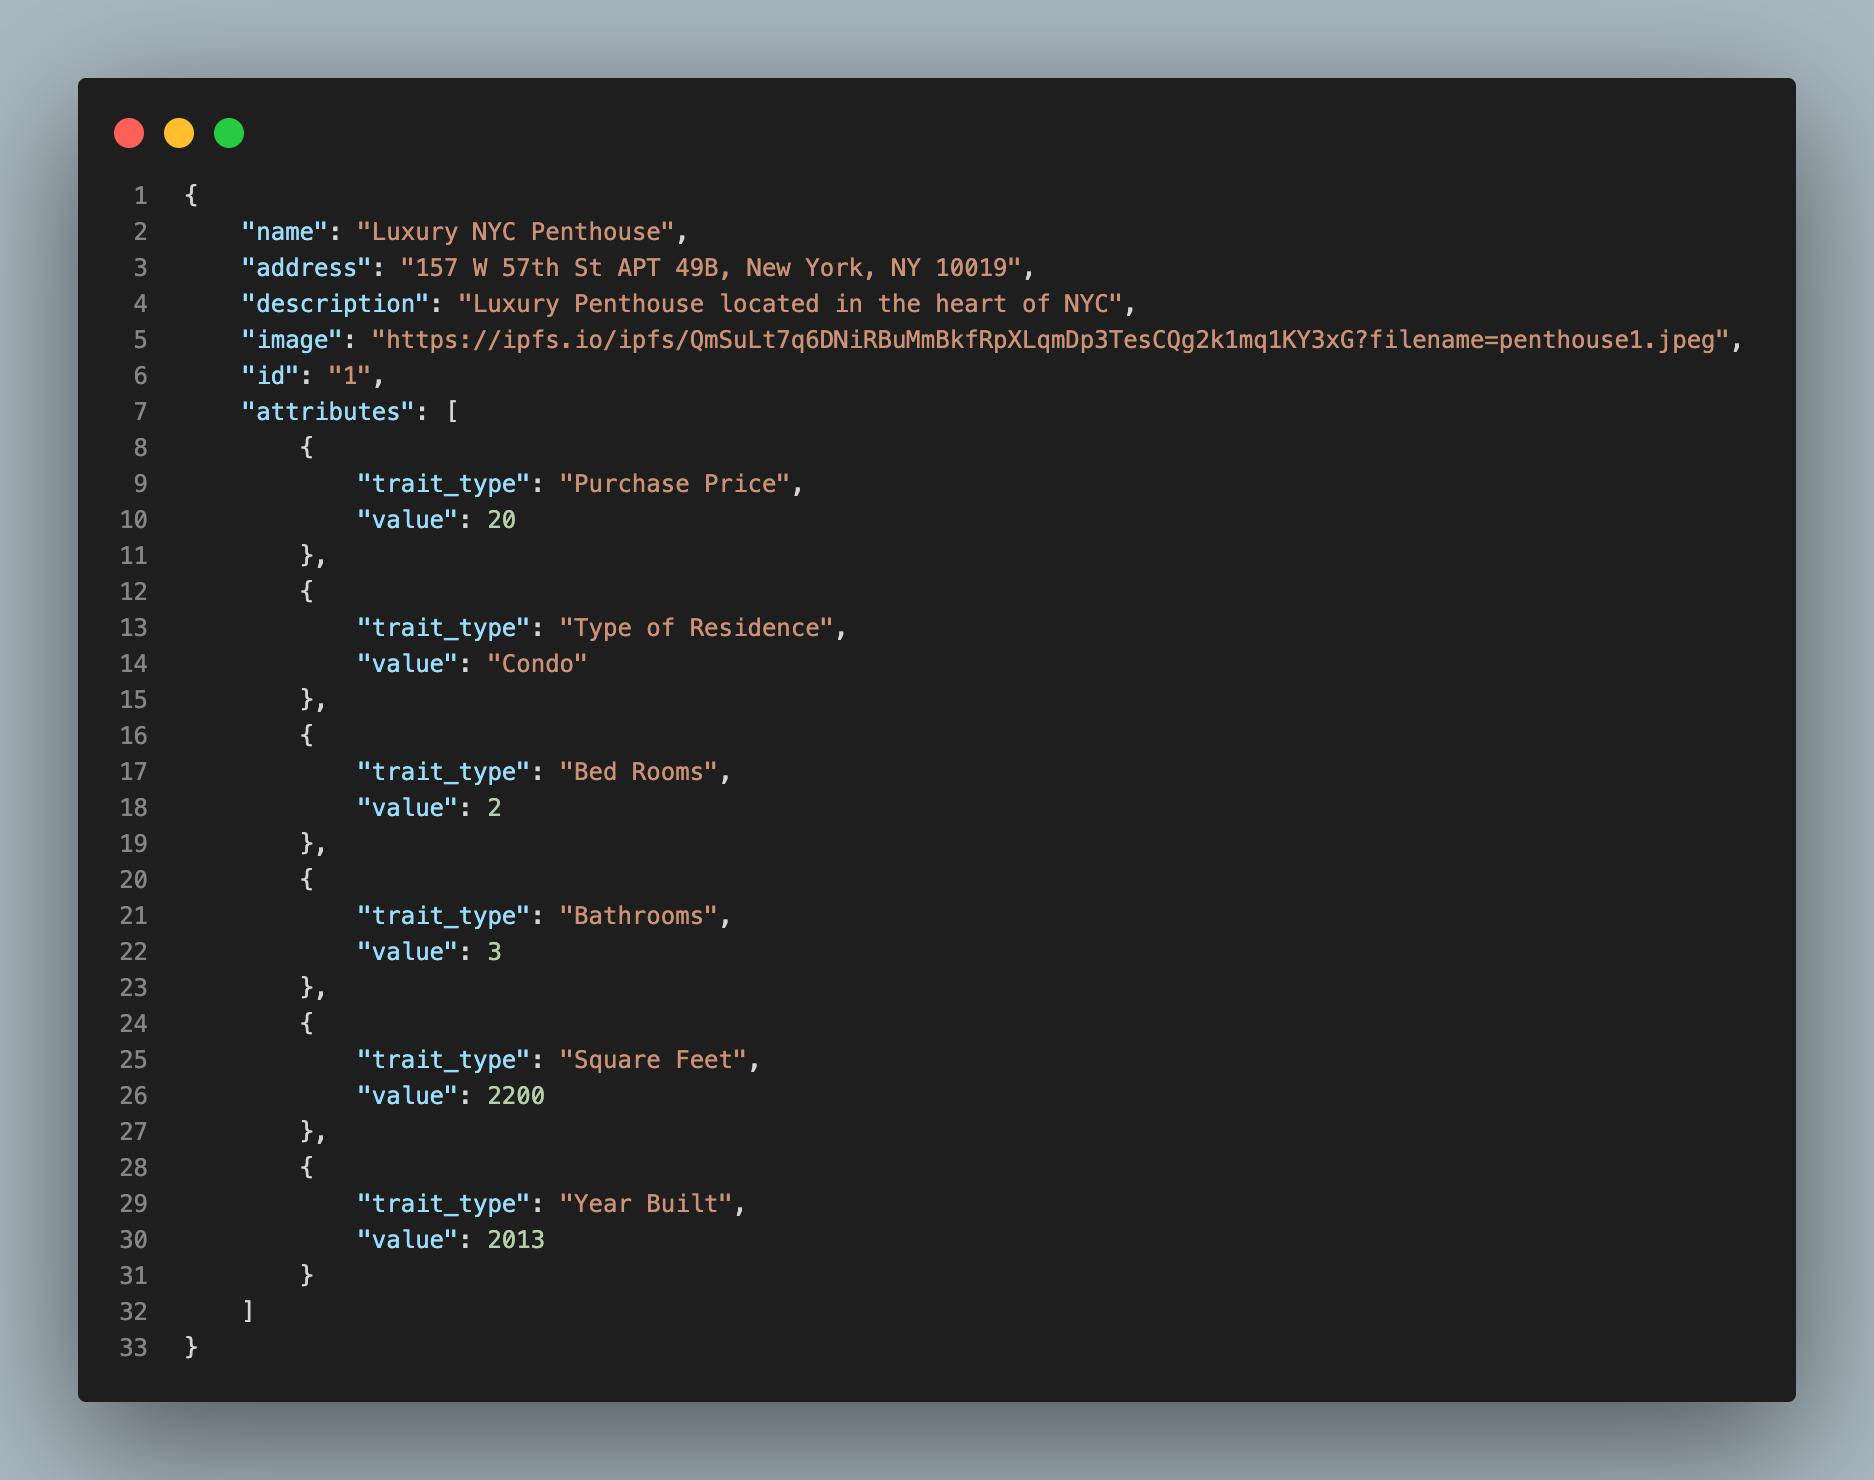
The sample code provided is quite similar to the metadata format used by OpenSea. This metadata contains the name you choose for the asset and the "image" that can either be a path or URL of IPFS. Furthermore, you can customize the appearance of the asset by adding specific "attributes" in the metadata, which will be visible under each item
Paste the JSON code into the json editor online and click the "save to disk" option.
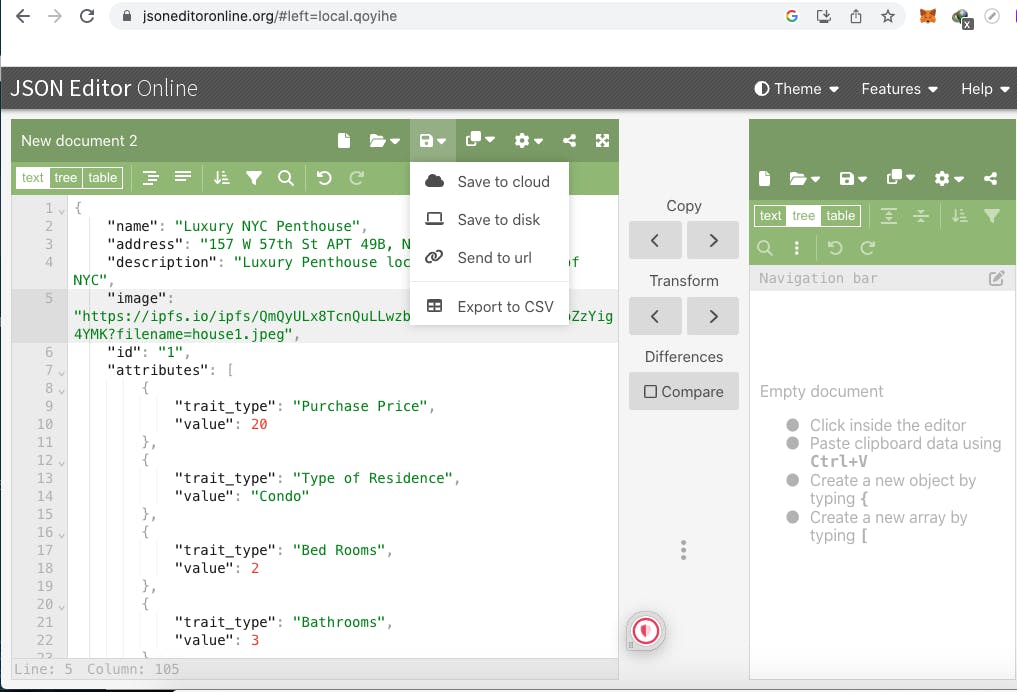
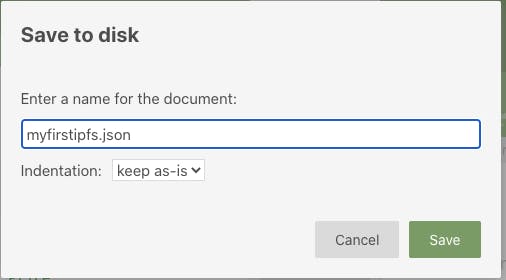
It's important to save the file in JSON format and name it according to your preference. I personally gave my file the name "myfirstipfs". Once you've named the file, simply click on the "save" button to start the download onto your computer.
How to upload JSON file to IPFS Desktop Application
Return to the IPFS desktop application installed on your computer and make sure it's running.
In the app, click on the "Files" tab in the left-hand sidebar.
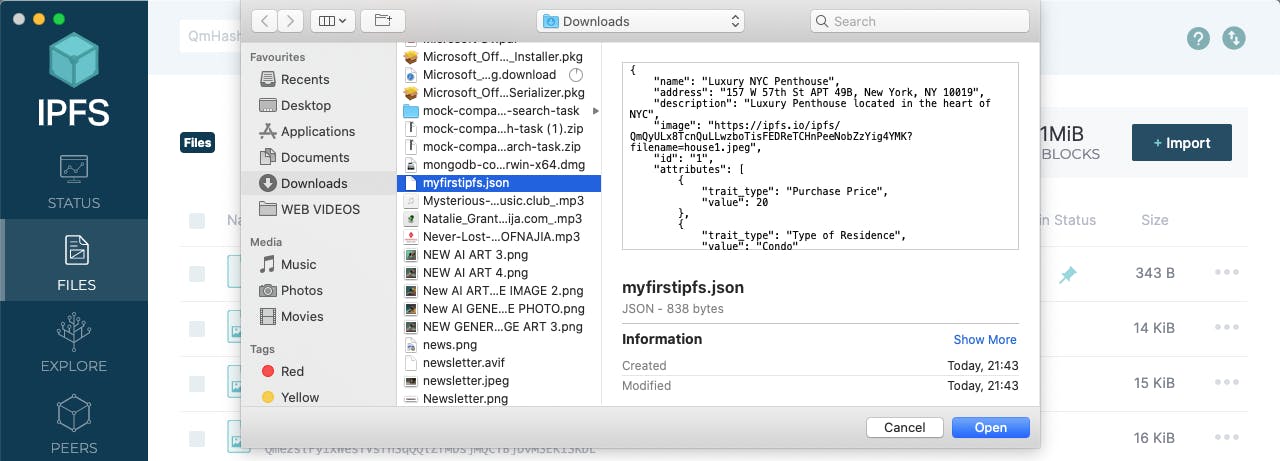
Click on the "Import" button in the top right corner of the app to import the JSON file you downloaded from the JSON editor online.
Select the JSON file you downloaded from json editor online by browsing through your computer's file explorer.
Once you've selected the file, click the "Open" button.
Wait for the file(s) to finish being added to the IPFS network.
The Important of pinning a file in ipfs
To pin a file in IPFS means to guarantee that it stays accessible on the network, even when the original uploader or publisher has removed or become unavailable. This involves creating duplicate copies of the file and distributing them across several nodes in the network so that the file can be accessed from various locations.
in summary, the significance of pinning in IPFS lies in its ability to maintain the availability and accessibility of content on the network, despite the constant joining and leaving of nodes. This feature eliminates concerns about the unavailability of original content sources and facilitates easy access for users. Moreover, pinning enhances the dependability and quickness of content distribution since cached files can be retrieved and served from the nearest node, reducing delays and enhancing download speeds.
Click on the three dots icon on the right-hand side of the JSON file's row.
In the dropdown menu, click on "set pinning".
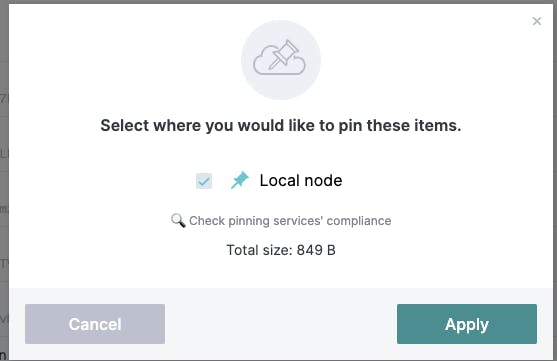
A window will pop up showing the progress of the pinning process.
click the checkbox "Local node" and proceed to the "Apply" button
Once the pinning process is complete, the file will be pinned to your local IPFS node.
To utilize the JSON file we added to the IPFS desktop for our application, we can use a link/CID provided by IPFS. This link/CID enables us to carry out various operations such as creating NFTs and assets with diverse properties that must be in JSON format.
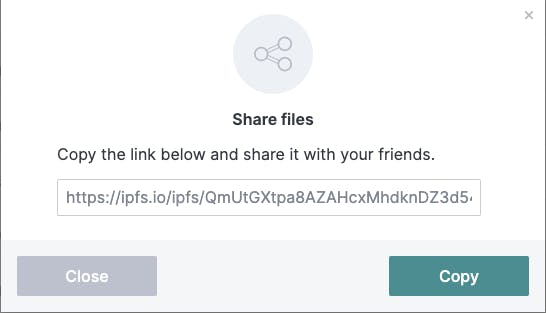
To proceed, Click on the three dots icon on the right-hand side of the json file's row.

To obtain the JSON file, click on "copy" and then paste the URL into your browser. The file will be retrieved and returned to you.
Well done! Through this article, you have gained an understanding of the inner workings of IPFS desktop Applications and JSON file.
I dedicated 20 hours of work to create this blog post, however, you are capable of sharing it on Twitter with only 5 seconds of effort.